Marketing automation allows you to perform an automatic action based on certain criteria, for example how your subscribers interact with your campaign or profile data on the subscriber themselves. This guide will demonstrate how this works when the trigger is a specific date.
You can have the system perform an automatic action a set amount of time before, on the day of or after a date recorded against the subscriber. This can be the subscriber's birthday, a custom date (date-type subscriber profile field) or after their creation date (the date a subscriber was first added to the account). The available actions are:
- Send an email campaign to the subscriber.
- Send an SMS to the subscriber.
- Send a notification to a specified email address.
- Add the subscriber to a list in Collect.
To do any of these things for a subscriber's birthday or custom date, you will need to have the subscriber's birthday or custom date data stored in the Sign-Up.to system. You will also need to have already prepared any follow-up content in the Create section of your account, i.e. email or SMS campaigns.
The process in detail is as follows, let's use the 'subscriber's birthday' trigger as an example, but the same theory applies to either of the date options:
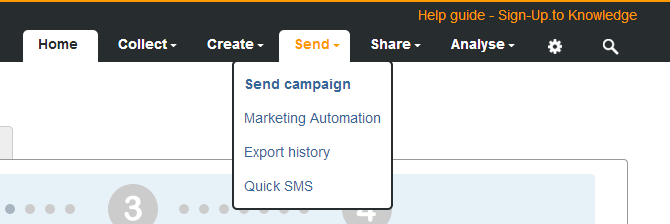
Go to the Marketing Automation tools within the Send section of your account.
Click 'Create a new rule'.

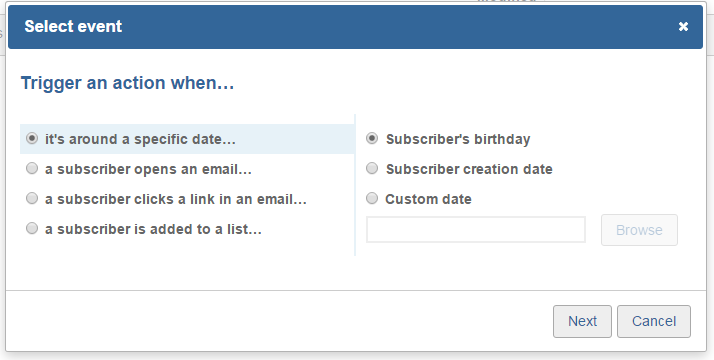
Choose to trigger an action when 'it's around a specific date' from the list, and then choose 'subscriber's birthday' on the right.
On the next screen you can set your desired action to be carried out.
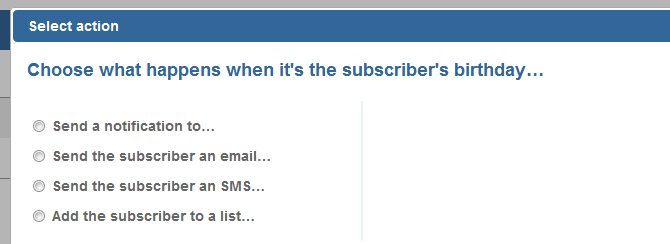
- The first option is to 'Send a notification to...', with you specifying the email address to be notified in the box on the right. This triggered action could be useful for letting a salesperson know that the subscriber has a birthday coming up. They might want to call and offer a promotion or discount.
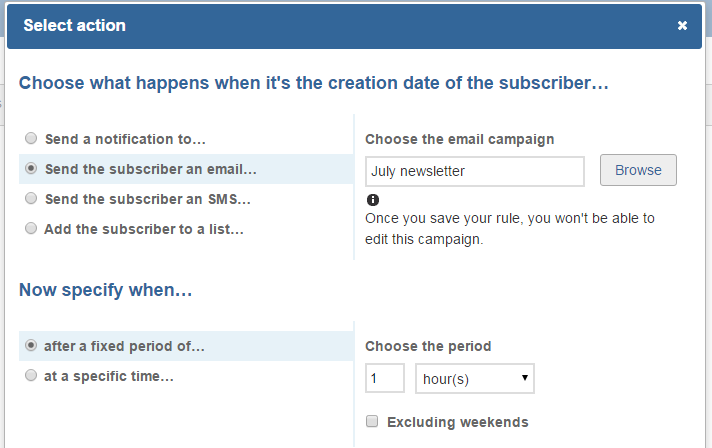
- The second option allows you to send the subscriber an email. Simply browse for the relevant campaign on the right.This action could be used simply to wish your subscriber a happy birthday; alternatively you might want to send them a voucher or promote an event they could attend and celebrate at.
- The next option allows you to send an SMS to a subscriber. Browse on the right for the SMS campaign you'd like to send and set the appropriate time for them to receive the message by using the options at the bottom of the box. Setting a time here is more important for SMS than email, as people might not want to receive a text at midnight (which is the default setting!). Please note, using this action will cost the standard amount in SMS credits (as specified when creating the campaign) and relies on you having a subscriber's mobile number in the system. If there are not enough SMS credits in the account or you have no number associated with your subscriber, then no action will be taken. As with email, this action could be a nice way to wish your subscriber a happy birthday. But you could go further and give them some kind of voucher to simply be brought in on the day and shown on their phone.
- The final option allows you to add the subscriber to a list, and choose the list within Collect that the subscriber will sit in.
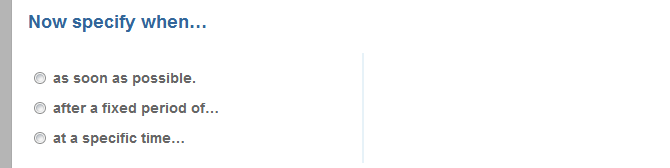
With the above options you'll be able to decide when the action should take place. The options are:
- As soon as possible. This means that the action will be triggered at 00:01 on the subscriber's birthday. Please note that this option is not available if the subscriber is being added to a list.
- Before/after a fixed period of time. Here you're able to determine how many minutes/hours/days after or before the subscriber's birthday the action takes place.
- At a specific time. This option lets you set a specific time (as well as time and date). This is ideal if, for example, you're looking to send an email campaign to subscribers at midday on their birthday.
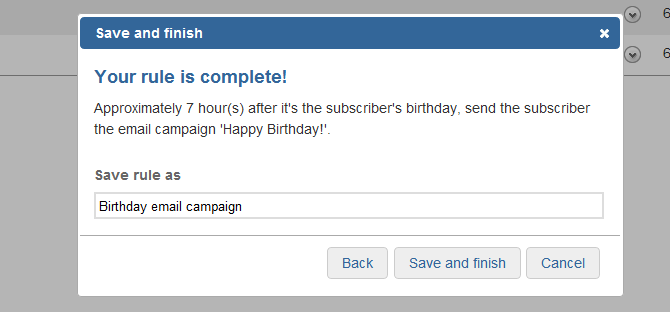
Once you have set up your rule, you will need to name it and save it.
Your new rule will now appear in the list on the Marketing Automation page. You can see a summary of the rule by clicking on the arrow icon to the right of the rule name.
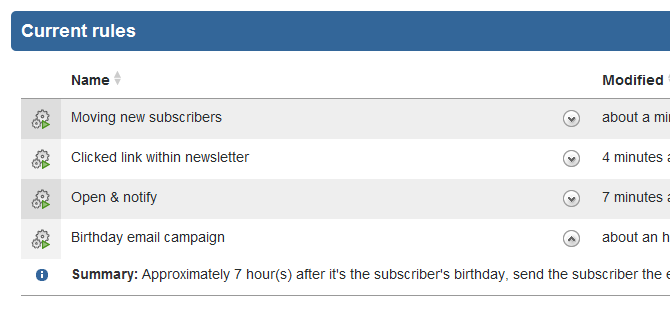
From here you are also able to edit any part of the rule, for example the action to be taken, the subsequent campaign to be sent or the timed delay.
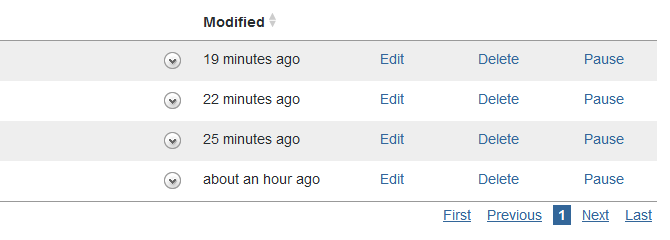
You are able to disable the rule at any time by clicking Pause (it can easily be resumed), or you can remove it altogether by clicking Delete. A rule will remain active until it is either paused or deleted.
Please note: when using the 'subscriber creation date' trigger, you’ll need to take care if you are in the habit of deleting and re-creating subscribers as this will re-set the creation date. Also, a marketing automation rule based on 'subscriber creation date' needs a minimum of one hour after a subscriber has been created before an email or SMS message can trigger.