Company profile fields are an advanced feature exclusive to our partners/resellers, requiring control panel access to set up and manage fully. This feature needs to be enabled for your control panel before it can be used. Please contact the team to arrange this. Once enabled this feature can also be restricted on a control panel sub user basis.
What is a company profile field
A company profile field is similar to a subscriber profile field, but stores information for an account as a whole rather than per subscriber. Company profile fields are an advanced feature, most useful when used in conjunction with the Template Publisher tool, giving you greater flexibility to personalise templates on a per account basis without the need to create separate templates for each. They also make updating data within campaigns and templates easier.
There are two levels of company profile fields:
Global profile field - this applies a field name to all accounts within your control panel. You then set a value for each account. For example, if you're a multi-venue brand with accounts for each of your venues, you could set up a global profile field to store the address for each venue. Then build one template to be published to all your accounts and personalise it with the global profile field, so that when the template is published to those accounts, the address details pull through on a per account basis and displays in their template. This saves you having to create separate templates for individual accounts, and allows you greater freedom to update templates with ease by updating the value in each accounts' company profile field.
Custom company profile field - this applies a field name to a single account. An example usage for this is if an account user has a paragraph that they wish to repeat on a regular basis in different articles in their Email editor campaigns, or a HTML snippet that they wish to insert regularly in the HTML Input editor. Once the field is set up, they simply enter the personalisation for the field in their campaign to save them copying and pasting every time.
Company profile field values can contain copy, special characters, or even HTML snippets (HTML snippets being useful for the HTML Input editor, not so much for the Email editor). Values can be updated at any time via the control panel.
Company profile fields can be used in Email editor campaigns and templates and also in campaigns built using our HTML Input editor.
How to create a global profile field
Within your control panel, go to the Accounts tab and select the 'Company profile data' sub menu.

Choose your field name wisely - once you've set the name you can't edit it. Subscriber profile fields and company profile fields can have the same name, with advanced rules coming into play as to which profile field overrides which, so to avoid this, pick a name that is easily recognisable as a company profile field.

Enter your field name then click the 'Add field' button.
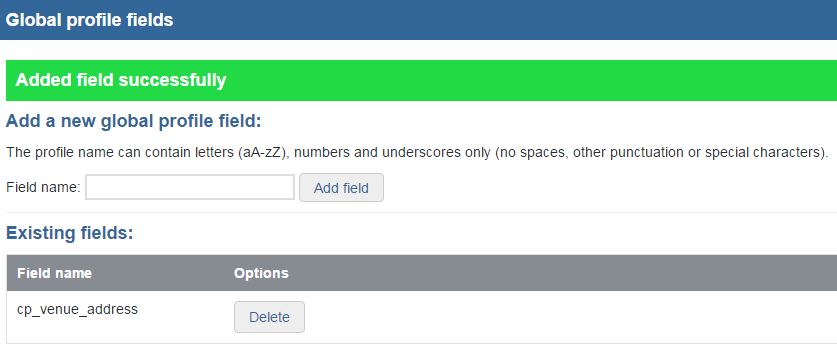
The global profile field will now be available when viewing the company profile fields for any of your accounts.
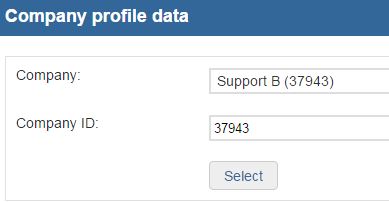
Next you need to set the desired field values for each account. To do this, select a company name in the drop down, or specify the company ID, then hit Enter or 'Select'.
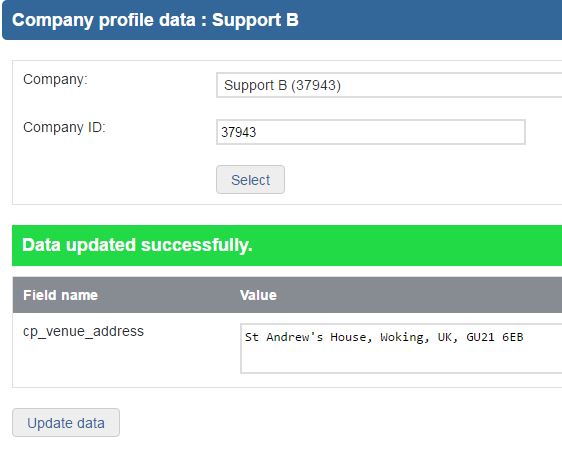
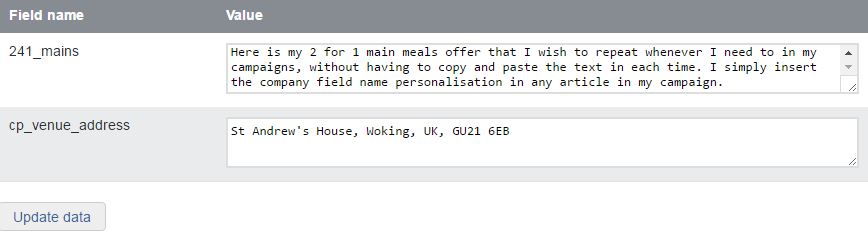
Then add the data value next to the associated field name and click 'Update data'. This is the data that will appear in the published template/campaign, in this example, the venue address details for that account. Repeat this for each account that you wish to set a value for.
How to create a company profile field
Within your control panel, go to the Accounts tab and select the 'Company profile data' sub menu.
To add a new custom company profile field, select the account you want to apply it to. You can either look for the company name in the drop down, or specify the company ID, then hit Enter or 'Select'.
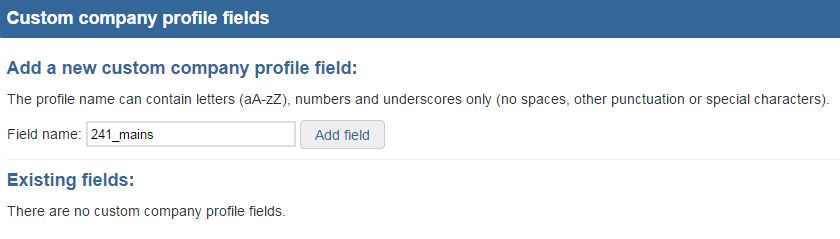
Input the name for the field and click 'Add field'.
Again, choose your field name wisely - once you've set the name you can't edit it. Subscriber profile fields and company profile fields can have the same name, with advanced rules coming into play as to which profile field overrides which, so to avoid this, pick a name that is easily recognisable as a company profile field.
Add the field value for the account. Then click 'Update data'.
Using company profile fields personalisation in campaigns and templates
Once your company profile fields are set up, you can use them to populate content in campaigns and templates. Company profile fields cannot be used in subject lines or 'from' names.
Email Editor
If you are using text values for your company profile field, the syntax for adding company profile field personalisation in the Email editor is identical to subscriber profile field personalisation:
{sut-profilefieldname:alt text}
Simply replace 'profilefieldname' with your company profile field name, and replace 'alt text' with whatever alternative text you'd like to display in the event that a value hasn't been set for that company.
When using company profile fields for links, you could either set the entire link as the field value via the control panel and place in the Email editor like this:
[Link text]($sut_profilefieldname$)
Or you could use a text field value to add to the end of a link, like this:
[Link text](http://domain.co.uk/$sut_profilefieldname$)
HTML Input
The syntax for adding company profile field personalisation in the HTML Input editor is the same as for subscriber profile field personalisation:
<signup_name value="profilefieldname" alt="">
The syntax for personalised links is:
<signup_link value="%sut_profilefieldname%" name="link_name"> Link text </signup_link>
At what point will I see the personalisation populate in my campaign or template?
If a standard Email editor campaign is created and company profile field personalisation is added to the campaign, the campaign view in the editor will show the personalisation tag. When the campaign is sent as a preview or send, the personalisation populates in the email.
If an Email editor campaign is created from a template which contains company profile field personalisation, the profile field is populated with the account's associated value data at the point when the template is opened.
IMPORTANT NOTE - if a subscriber profile field and a company profile field share the same field name, the subscriber profile field data will override the company profile field data when used in a standard campaign. When creating a campaign from a template that includes the company profile field, or when copying a campaign built from a template that includes the company profile field, the company profile field data overrides the subscriber profile field data.
Updating company profile field values
Company profile field values can be updated at any time via your control panel. Simply select the desired account within the 'Company profile data' sub menu and update the field value.
When a published template is used to create a campaign and the campaign is saved, the profile field values are hard-written into the campaign and will not change, even if the company profile field data is updated in the control panel. Creating a new campaign from the same template will use the updated values.
Best practice when using company profile fields in conjunction with Template Publisher
1. Set up your company profile fields and set their values on all required accounts.
2. Dedicate a specific account to template builds.
This makes template creation management much simpler.
3. Configure the 'template build' account with the correct fields.
You cannot save a campaign if the account you are building in doesn't have matching profile field names. This isn't a problem if using global profile fields as these apply to all accounts within your control panel, but if you are creating a campaign in your 'template build' account for an account that has a custom company profile field that you wish to include in the template, you must set up this profile field name for the 'template build' account also.
4. Create a standard campaign using the right tags for personalisation
Don't start your template by opening a pre-existing custom template in the Email editor, if that pre-existing template has company profile fields already in it. Doing so will mean that the field values display rather than the personalisation syntax, meaning the personalisation won't work correctly when you publish the template. Always create a campaign from scratch using a default template, or copy an existing campaign that hasn't been created from a pre-existing personalised template.
- When personalising text elements, use the format {sut-fieldname:alt text}
It is very important to include the end ':' even if there is no alt text to be set. Without the : it will not work.
- When personalising data in a link, use the format $sut_fieldname$
Note here that the separator from the sut prefix is an underscore ( _ ) but in the other text tag it's a hypen. Get this wrong and it won't work.
5. Save a copy of your campaign BEFORE saving as a template
Always save a copy of your campaign BEFORE saving it as a template. That way if you need to go back and make an amended version of your template, you can go back to the original campaign build where the fields display as unpopulated personalisation syntax. If you skip this step and make an amended version of your template from the template, you would need to change all the populated fields in your template back to the personalisation syntax.
6. Save as template and test
In order to test properly, the campaign will need to be saved as a template, and then distributed to a test account which has the relevant company profile fields enabled and values set.
When creating a campaign in this account from the template you should see that all fields have been replaced in the editor with the values from the company profile fields. If they have not been, re-check steps 1-5.