| This guide references Classic Editor, a legacy feature which might not be available in your account. |
There are times when you require a little more flexibility in designing your email than Campaign Designer offers. Tables are the foundation for building any template, so here is a quick guide that will get you on your way to building fantastic looking template in our Classic Editor.
For more information on structuring nested tables, take a look at our tutorial.
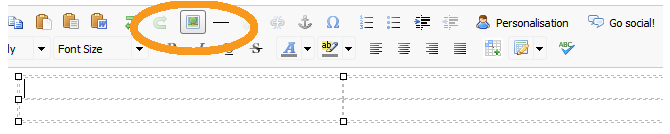
1. Toggle on table visibility
The first thing you should do when building in the Classic Editor is click 'Toggle table visibility' in the bottom right corner. This turns the guidelines of tables on and off so that you can view the structure of your campaign. The standard dotted border of a table won't be visible when you send the campaign out, but you can set the border to be visible later on.

2. Insert a new table
To insert a new table, place your cursor where you wish to insert your table into your campaign and click 'Insert table' in the toolbar. Specify the number of rows and columns you need in your table. Cell Padding and Cell Spacing should be set to '0' unless you require them. By changing the Border field you can set the width of the border, which will make it visible on the final campaign.
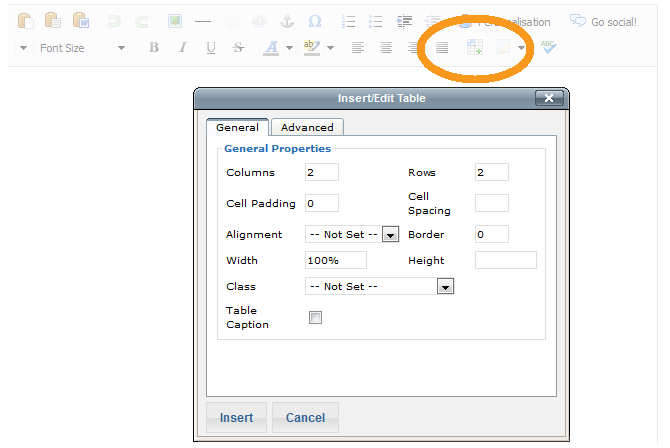
Choose your table alignment and set the width. It's best practice to keep your email campaign under around 700px wide as this fits in many inbox preview panes and can be printed on an A4 sheet of paper. You can go back and change the width of your table at any time by returning to the table options using the 'Modify table' tool.

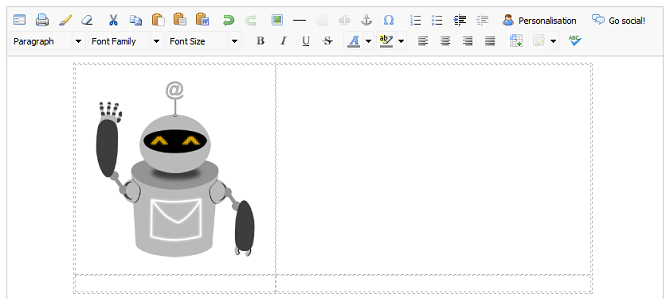
3. Insert images
When you are ready to insert images into your table, place your cursor where you want to insert your image and select the 'Insert/edit image' tool. Pay particular attention to the width/height ratio of your images – if you need a refresher in inserting images, take a quick look at our tutorial.
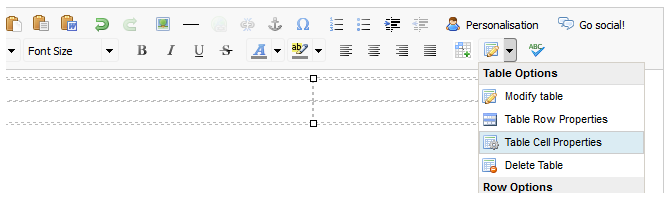
4. Specify table cell widths
Good practice is to make your table cells the same width as the images within them. To do this, click the arrow next to 'Modify table', and select 'Table cell properties'.
5. Remove unwanted line breaks
Once your images have been inserted, you may find that you have some unwanted line breaks either above or below your image inside the table. A combination of trial and error with the delete and backspace keys and strategic placement of the cursor will usually take care of this.
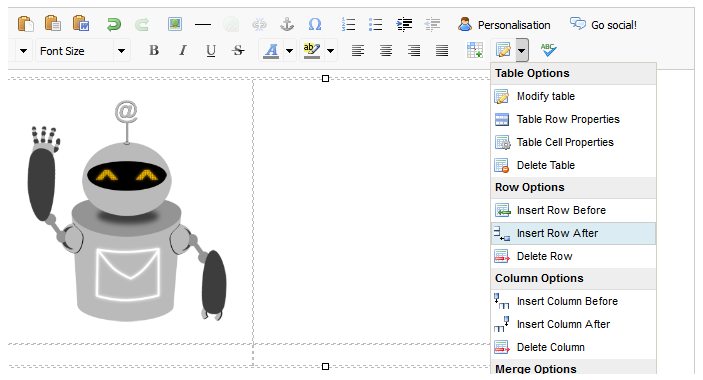
6. Add a caption to your image
If you wish to add text or a caption underneath your images, click on the image and, from the arrow next to 'Modify table', click 'Insert row after'. If you wish to add text above, click 'Insert row before'.
7. Further table modifications
The 'Modify table' tool allows you to change certain aspects of the overall table design such as background colour, border and width of your table. You can amend the colour of individual cells, vertical alignment of text and specify dimensions of individual cells by clicking the drop down arrow next to 'Modify table' and selecting the 'Table cell properties' tool when clicked in the appropriate section.
Problems with your tables?
Our table troubleshooting guide might have the solutions.