| This guide references Classic Editor, a legacy feature which might not be available in your account. |
The trick to building a well-structured template in Classic Editor is to use nested tables. This is the term for tables within tables, and it's a great way to build up your template so that it supports multiple sections, images, text, and most importantly so that it works in all major email clients.
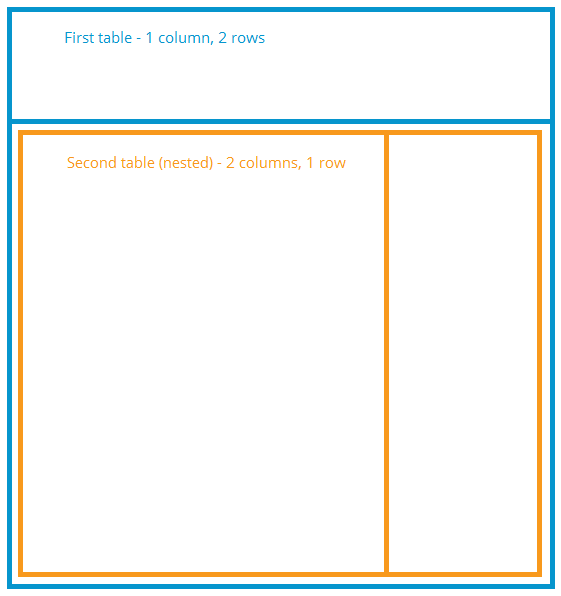
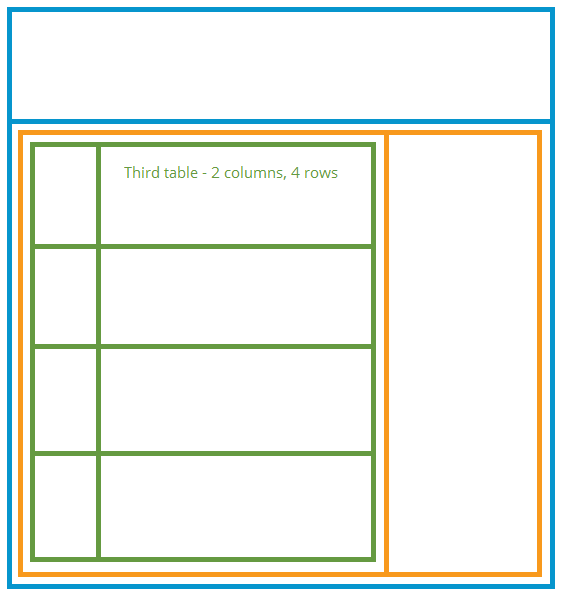
A rule of thumb with nested tables is to start simply and build it up from there. Most templates will have a table that is 1 cell by 2 as a basic foundation, and will nest tables within each section that have a few more cells depending on the needs of that section. The best thing to do is plan out your structure beforehand.
When planning, the things to consider are:
- How is the layout going to appear? For example, if the general idea of the template is to have a section on the left for the main body, a section on the right for links, and a section at the top for a large logo, you might start with the following:
- What should line up within the email? If you are showcasing featured products down the lefthand side, and want a text description for each one, this layout could work:
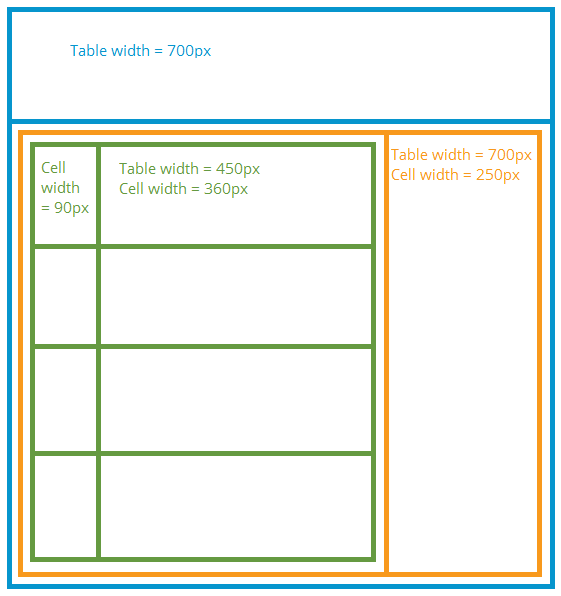
- What are the widths of your sections? A good practice in building a template is to specify the widths of cells and tables rather than leaving these blank. This locks the tables and cells in place and stops certain pesky email clients moving them around. For example:
Planning is key to building a quality template that will stand the test of the internet! Problems with your tables? Try checking out our guide to table troubleshooting.