A subscriber profile allows you to import tailored information into your Sign-Up.to account as well as collect additional information from your data capture form.
First head to 'Subscriber profiles' under the Collect tab in your account. Here you can add multiple subscriber profiles. To add a profile click 'Add new subscriber profile field' at the top of the page. This will open the editing window.
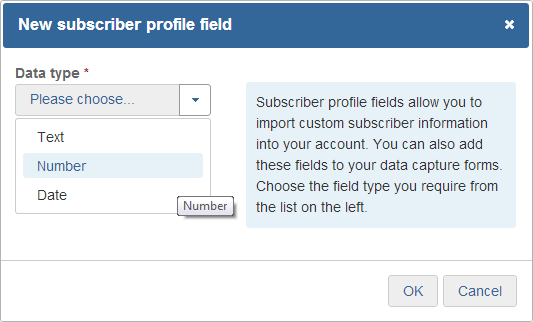
Select a data type
There are three types of data you can import:
- Number - any positive or negative number
- Date - including day, month and year, and an optional time of day down to the second
- Text - any form of text, including letters, numbers and symbols (these fields can also be added to a data capture form)
Number-type and date-type data
Number-type fields can contain any positive, negative, whole or decimal-point number. This data can include a currency symbol (such as £ or $) but these will be stripped out during the import. No other characters (such as AU$ or other punctuation) can be imported.
Date-type fields will recognise dates and times in a number of formats, for instance 12/03/2014 or 2014-03-11 (but it won't recognise fully written dates such as "12th June 2014"). The system will assume that dates are in UK format, so the day should come before the month. Regardless of how you import the data, our system will store it as YYYY-MM-DD.
Once you've selected number-type or date-type for your field, you'll need to give it a description so you can remember what kind of data you're storing (the date someone signed up to a gym, or how many guests they want to bring to a hotel, for instance).
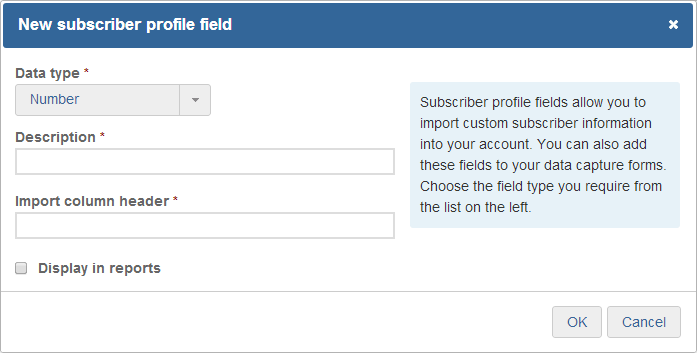
You'll also need to choose an import column header. By default, this will be the same as the description joined with underscores (for instance, "number_of_guests"), but you can change this to whatever you find most helpful. This import column header will need to be at the top of the column in your CSV file, so that when you import data, the system will know where to store the data in that column.
Text-type data
If you've selected Text, you'll need to also select a field type, which will dictate how subscribers can interact with the field on a form.
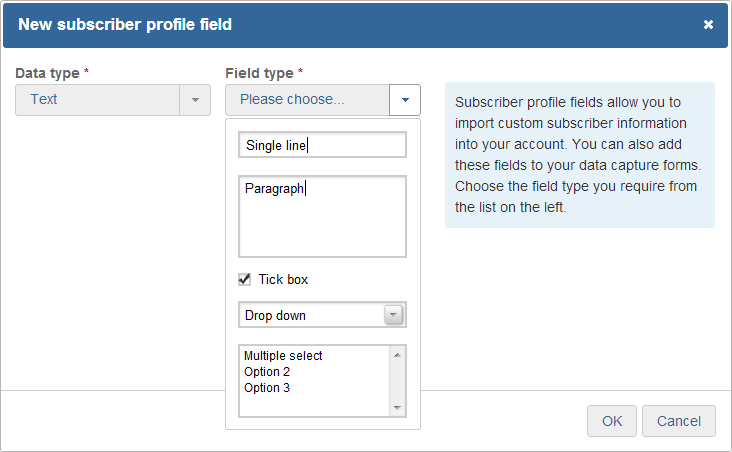
- The single line option allows for any data to be imported.
- Paragraph is similar to this, but allows for more information to be imported.
- The drop down and multiple select options are similar to each other as they allow you to preset the information you're collecting. It's important that imported data is the same as the preset options in order for the data to be recognised. When importing information for the multiple select option, you can separate answers with a comma.
- The tick box option allows subscribers to make a 'yes' or 'no' choice to a given option.
Depending on your choice, you'll have a selection of options, all of which are listed below.
Label/Question
You can now add a label/question for the profile. This is the text that will appear on your data capture form (for instance, "How many cats do you own?")
Size
If you've chosen Paragraph, you can select the size of the field on the form. This does not affect how much subscribers can type in, but it can be a handy guide for them (a smaller box will encourage a smaller answer).
Pre-filled answer
Paragraphs and Single Lines can have pre-filled answers which will appear on the form before the subscriber types their own answer. If they don't change the text, this will be submitted as their answer. This is useful if there is a default answer for most subscribers (for instance, the most common way to hear about you might be "Word of mouth").
Checked by default?
If you've selected Tick Box, you can choose whether the box is already checked when the subscriber arrives at the form. They can then uncheck the box or leave it checked - ideal again for if there is a default answer for most subscribers.
Options
Multiple select and drop down fields need prewritten options for the subscriber to choose from. You can enter an option in the box, click 'Add' to add more options, and use the 'x' to remove options. You can add as many options as you need.
Import column header
As with number- and date-type fields, you'll also need to choose an import column header. By default, this will be the same as the description joined with underscores (for instance, "favourite_colour"), but you can change this to whatever you find most helpful. This import column header will need to be at the top of the column in your CSV file, so that when you import data, the system will know where to store the data in that column.
Select any additional options
For most of the text-type fields, there are four additional options you can select.
- Compulsary: if checked, the subscriber cannot submit the form before filling out this field (the "email" field is always compulsory, but tick boxes cannot be compulsory).
- Allow subscriber to amend choice later: this gives subscribers the option to return to your data capture form and update their own data choices.
- Display in reports: by checking this option you'll be able to view this profile field in analysis reports, associating answers with clicks and opens, for example.
- Hidden: use this if you don't want it to be available on the data capture form but you want to store that information privately.
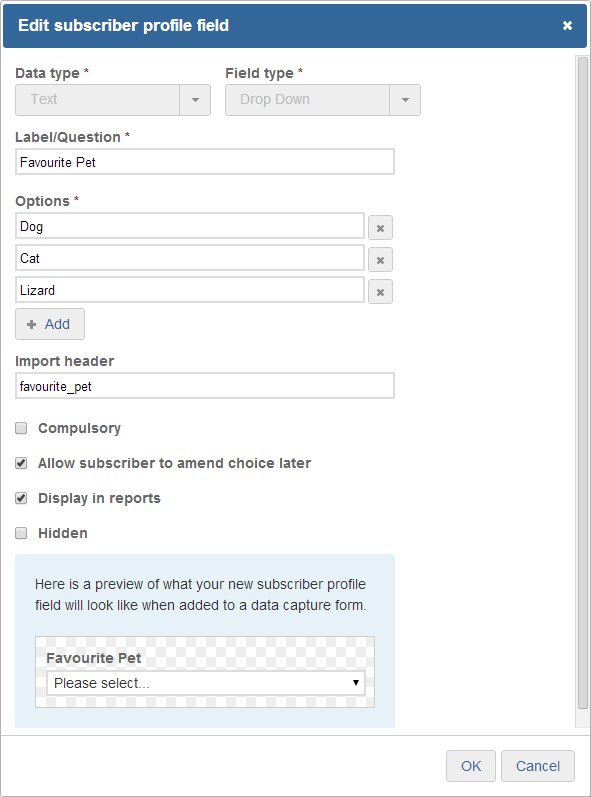
Preview your field
If at any point you're unsure as to how the field will look, you can use the preview pane at the bottom of the window.
Once you're happy with the field you've created, click 'OK'. This will take you back to the subscriber profile page, where you will see the profile you have just created. You'll also see all of your subscriber profiles on this page, and can edit and delete profiles.