Data capture forms are a great way to build your mailing list. By creating a form using Sign-Up.to and embedding it on your website, you can make it easy for people to subscribe to your newsletter, enter a competition, fill in a quick survey and much more. The subscriber data will be put straight into the chosen list in your account.
Data captured through forms is validated using a confirmed opt-in process. After completing a form, each subscriber is sent an email with a unique link in it which they must click to finish the subscription process and appear in your lists. This is to stop people signing up others without their consent, and prevent worthless junk data being stored in your account. Once you have created your form you can customise the confirmation email that is sent, or use the default one we create for you.
To create a data capture form, select 'Forms' under the Collect tab and then click 'Create a data capture form'.
Connect your form to a list
The first step is to select the list or lists you want subscribers to be added to when they complete the form (make sure you've created a list first!).
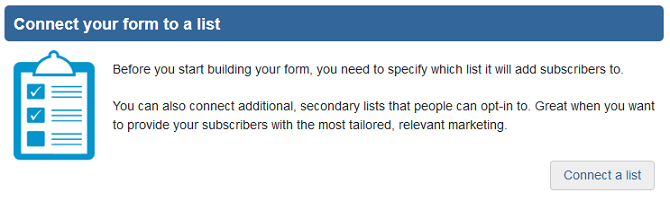
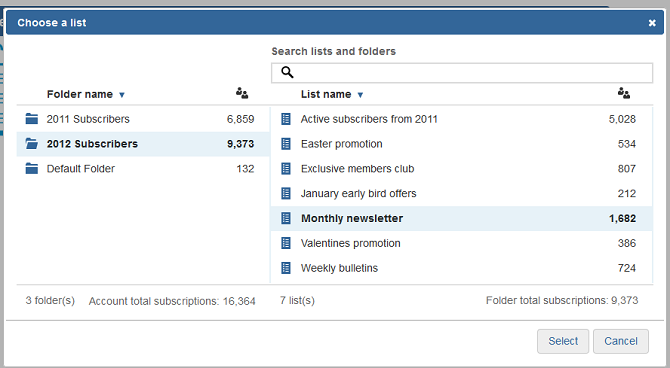
Clicking 'Connect a list' will open a view of all your folders and lists. If you connect multiple lists, subscribers will always be added to the primary list and will be able to opt in to the secondary lists. You can come back and edit the lists connected to a form at any time.
Once you have selected at least one list to connect to, click 'Continue' to open the form builder.
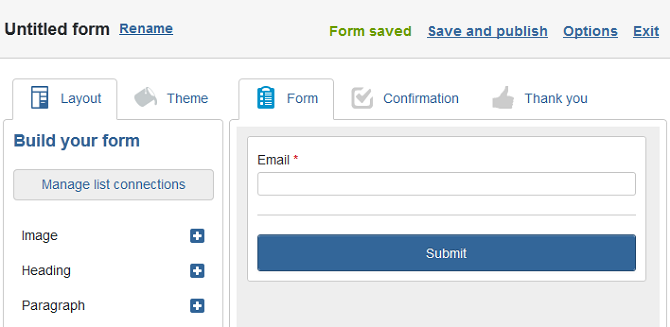
Build your form
In the 'Layout' library on the left-hand side of the screen, you'll find fields which you can add to your form. Clicking on a field will add it to your form and you can remove a field (except for the compulsory email field) by clicking on the bin symbol in the editor.
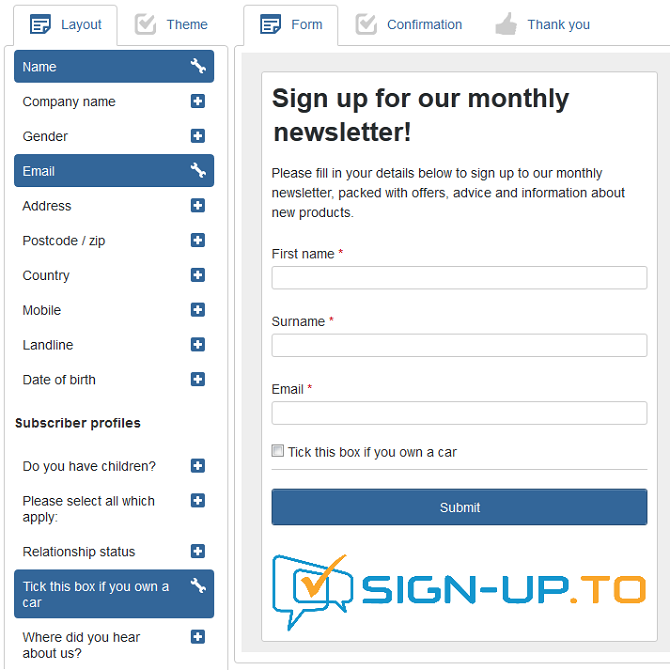
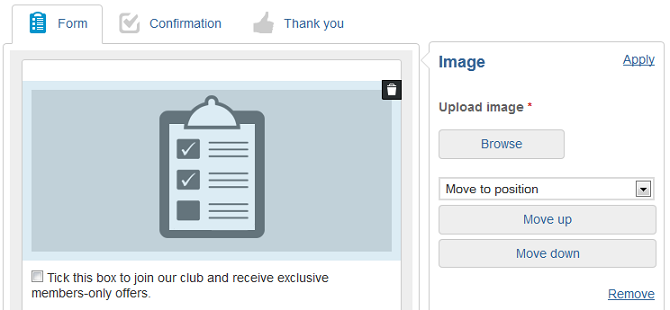
Add as many images, headings, paragraphs or HTML sections as you need to customise and guide your subscribers through the form. Then select from our range of standard fields or your own custom subscriber profiles to gather the data you need.
Once you've added all the fields you want, you can arrange these in the editor by dragging and dropping them.
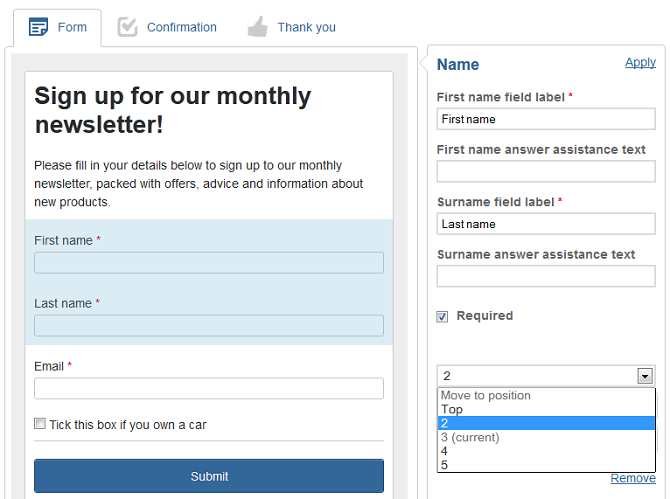
Edit question field properties
Clicking on a field in the editor also opens the properties window on the far right. Here you can change the name of the field, decide if it's a compulsory or optional question and move its position in the form. You can also remove a field (except for the compulsory email field) by clicking 'Remove' in the field properties.
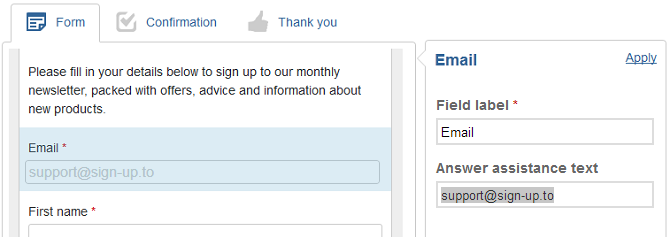
Answer assistance text appears in grey in the form and can be used to suggest what a subscriber should enter in the field. This text isn't submitted if the field is not edited by the subscriber.
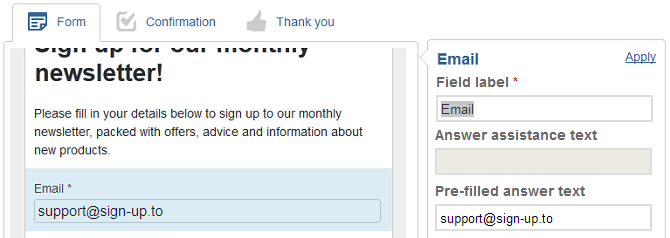
Pre-filled answer appears in black in the form and this text will be submitted if the subscriber doesn't edit the field.
Secondary lists
If you've connected more than one list with your form, tick boxes will automatically be added so that subscribers can choose to also add themselves to these lists. You can change the text next to these tick boxes to make them more relevant to subscribers and entice them into signing up to additional lists.

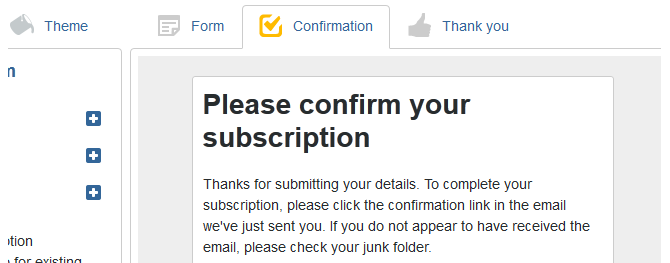
Build your confirmation and thank you pages
The tabs along the top of the editor allow you to toggle between the form page, the confirmation page and the thank you page. You can add images, headings and paragraphs to the confirmation and thank you pages.
Style your form
The 'Theme' tab allows you to change the colours and fonts on your form, confirmation page and thank you page to match your branding. Clicking on the customisation field applies it to your form. To remove a customisation, simply click on it again in the library.
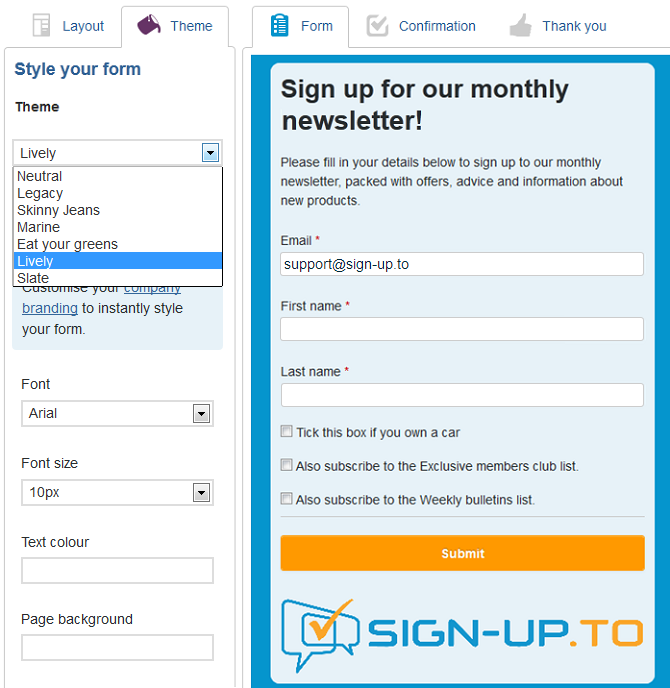
You also have the option to set your own company branding and then apply these colours and fonts to your form. Or if you're stuck for a style, why not choose one of our stock themes and make it your own?
Once applied, your chosen theme and any customisations will be applied across all three opt-in pages.
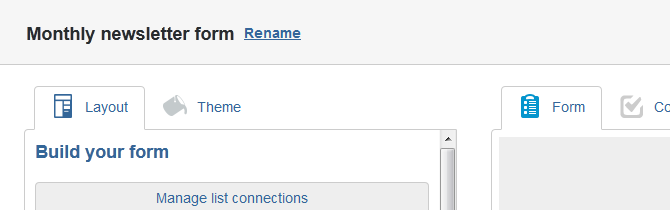
Rename your form
Don't forget to choose a name that's memorable. You'll be prompted to name your form before you can save it.
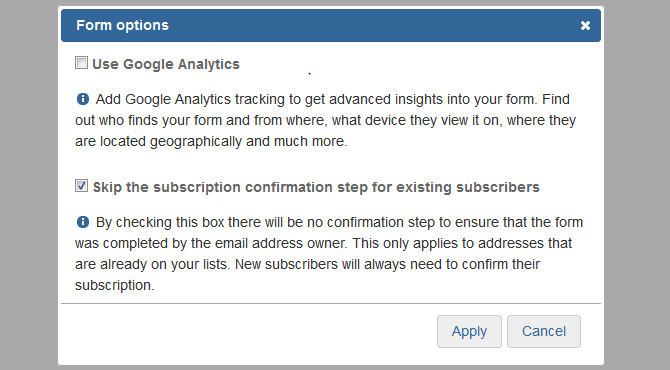
Form options
Clicking 'Options' next to the Save and Exit links in the top-right of the editor opens the 'Form options' window. Here you can add Google Analytics tracking (click here for a detailed tutorial).
You can also choose to skip the confirmation step for existing subscribers. This is useful when you're trying to gather additional information about subscribers to help with data segmentation and targeting. For example, if your form is in the style of a survey, existing subscribers won't have to click on a link in an email to submit their answers.
Save your form
Toggling between the 'Layout' and 'Theme' tabs requires a save to ensure the system remembers your changes. You can also save your form at any time by clicking 'Save and publish' in the top right. Whenever you save, any changes to your form will go live straight away and, if your form is already embedded on your website, subscribers will be able to see the changes.
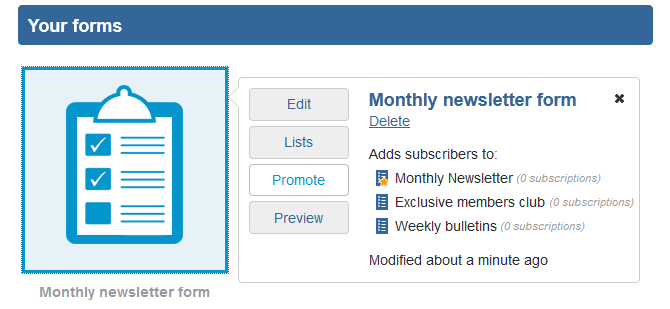
Promote your form
Once saved, you can find the unique URL for your form at the bottom of the form editor. Alternatively, click on its icon in the 'Forms' and then click 'Promote'.
Find out more about the ways in which you can promote your form in our detailed tutorial.
Once you have created your form, you also have the option to clone it. This will create a duplicate of the form which you can continue editing, so that you can have two similar forms without having to start again from scratch. The duplicate will be linked to the same list and have the same settings, so remember to amend these if you need to.