You're just home from your big event and it was a success! Loads of people wrote their email addresses on your forms, or left their business cards in the tray reading "Please send me your newsletter". These will make great additions to your newsletter, but take care - what you have here is what's known as single opt-in data. What that means is that the newcomers have given you their email addresses, but they have not verified them. For all you know, the addresses could be wrong, old, or incorrectly spelled - and that's before you have to manually type them into your database, which could lead to more typos.
Using the double opt-in loop on our data capture forms and a quick one-off setup, you can convert your single opt-in data from your event into good practice, high-quality double opt-in data with hardly any extra effort.
1. Create a data capture form
This won't actually be seen by your subscribers, so don't spend too long on it! It just needs the default field for the subscriber's email address.
2. Create a custom opt-in email
When you create your form, you'll be asked to link it to a list. Let's say you create a new list called "Event data". Go to this list in your Collect section, click "Modify", and select "Custom opt-in email" and "Create message" or select from your existing custom opt-in emails.
The standard walkthrough for creating a custom opt-in email can be found here, but this one needs to read a bit differently. Since you're the one who will be entering details, you need to include an explanation in this email. You could thank the subscribers for attending your event, remind them that they gave their email address, give them an idea of what to expect from your mailing list, and ask them to confirm that they'd like to be a subscriber.
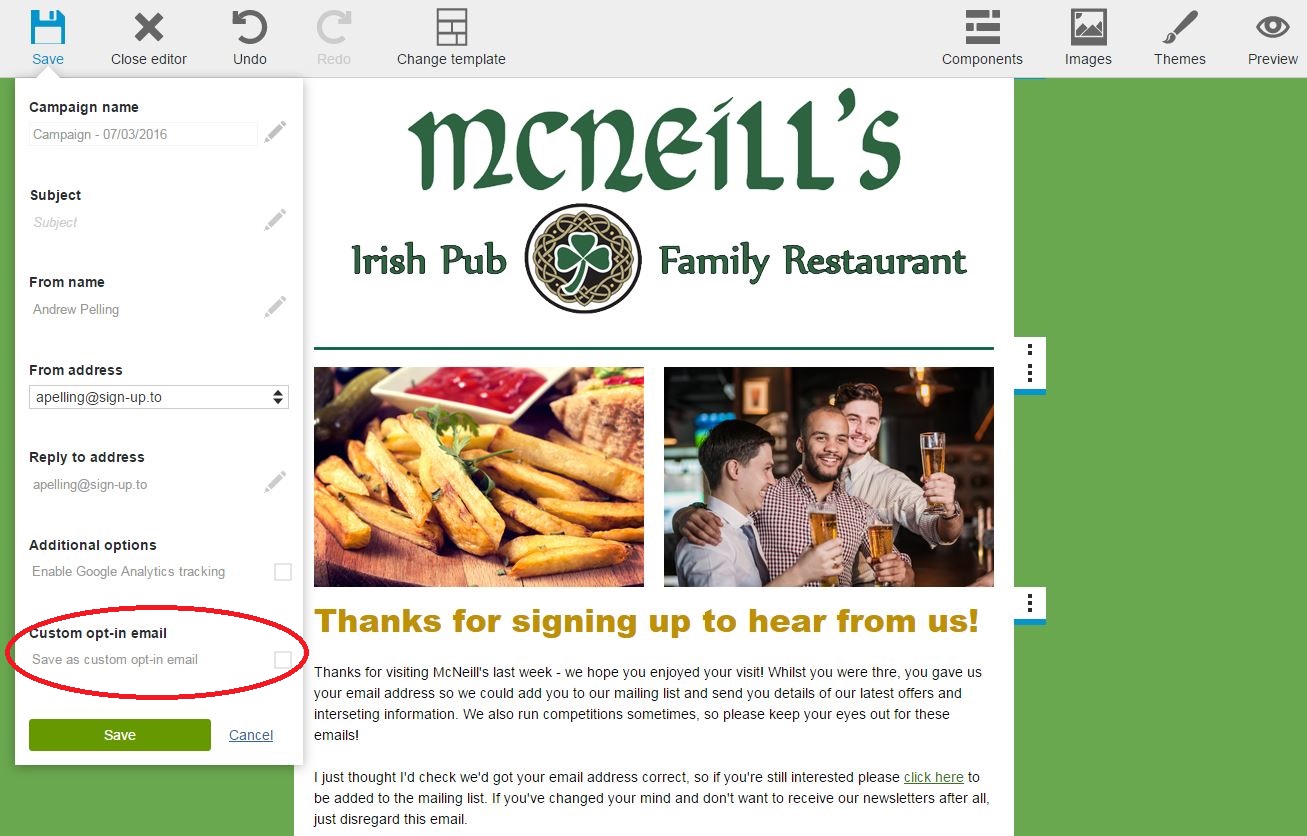
Once you're happy, save the email.
3. Start verifying!
Around this time is when you'd normally get your least favourite intern to manually input all of that hand-collected data into your CSV file, or straight into the database. Keep that intern handy, but instead of putting the addresses into Excel, get them to type them into the form you created earlier. Thanks to the double opt-in loop included in the form, when you hit 'submit', the system will automatically send out your custom opt-in email. Then, when the subscriber clicks to confirm that they want to be on your mailing list, they'll be automatically added to your "Event data" list, instead of you having to put them in manually.
For the same amount of manual input work, you've weaned out any incorrect addresses, avoided paying for any subscribers who aren't interested, and at the same time set the expectations of your newcomers, meaning they'll be ready and waiting for your first mailing.
There's more you can do from here as well - you could set a Marketing Automation rule to send them their first 'welcome' email once they've confirmed their subscription, or send them another form to fill out the rest of their details for you.