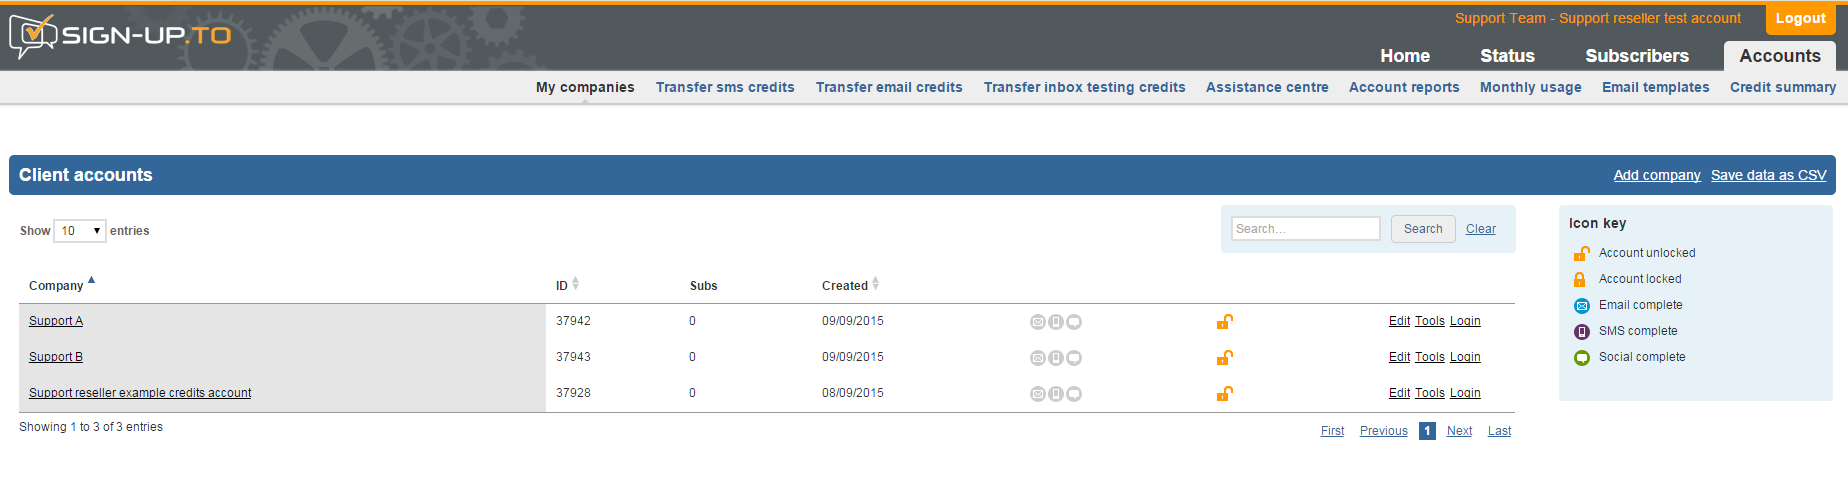
My companies in the Accounts tab is where you can set up and edit all of your client accounts. It shows a list of each of your accounts, their company ID, name and total number of subscribers.
How to add a new company
1. Click on Add company to set up a new account. This will open the Edit screen.
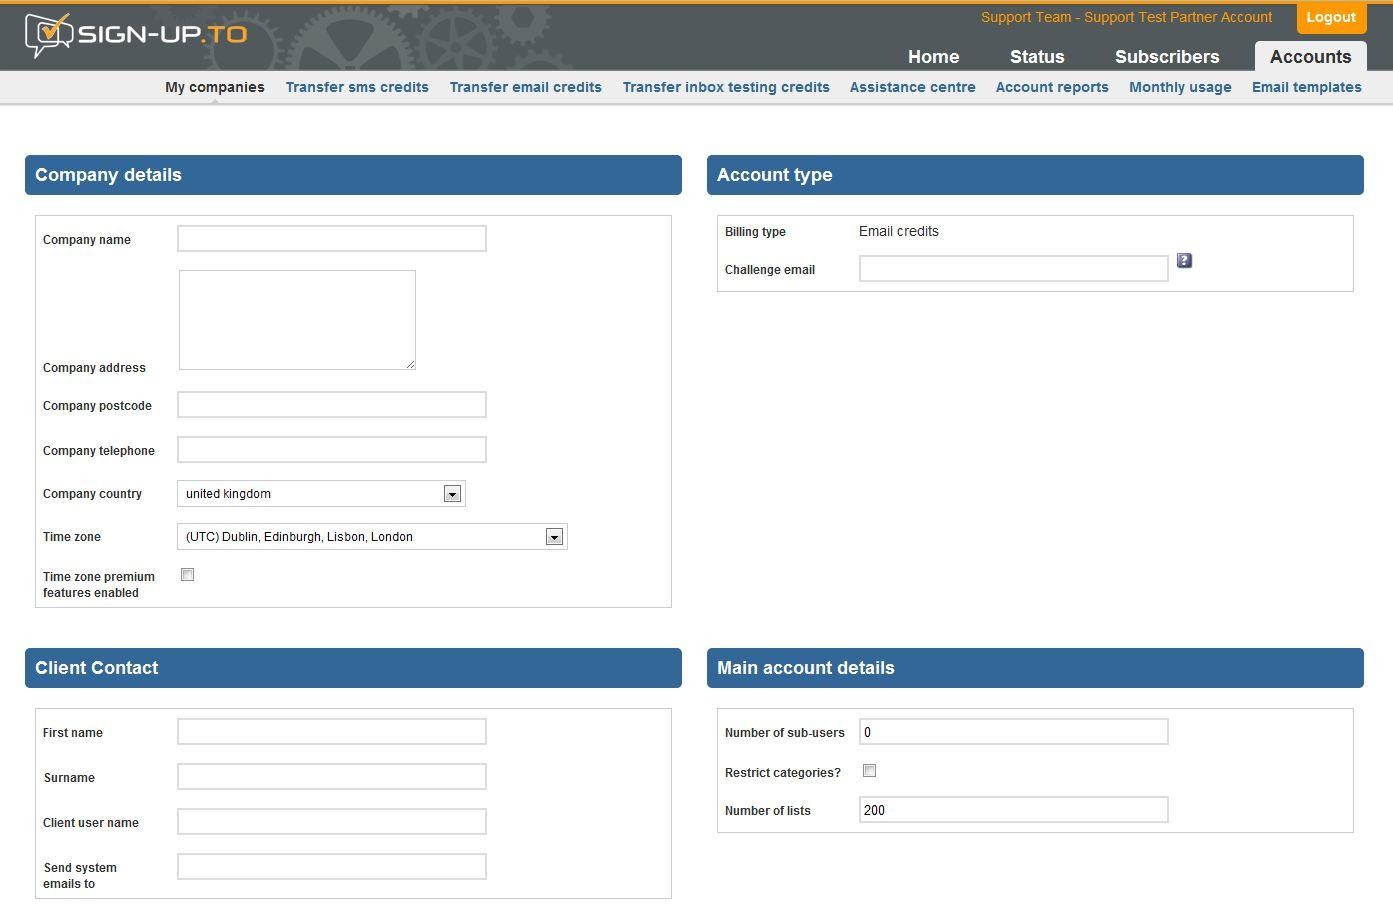
2. This page is where you input all the relevant account details and select the features that their account is to display. Some default settings are set for you already. Listed below are areas of the account that must be completed (asterisked) plus others to consider. All other features not listed here can be ignored, but please speak to the Support team if you have any questions:
Company details
- Company name*
- Company address*
- Company telephone*
- Company country*
- Time zone – Select the default time zone for the account. All dates and times displayed in the secure application will reflect this setting.
- Time zone premium features enabled – Tick this box to enable advanced date/time pickers in the secure application, allowing users to easily schedule campaigns and social posts in a different time zone to their own.
Account type
- Challenge email* - Some users protect their inboxes from spam by sending a message to senders to check that they are legitimate. Enter an address here that we can forward these requests on to.
Client contact
- First name*
- Surname*
- Client user name*
- Send system emails to* - this is the address that account notifications get sent to.
Main account details
- Number of sub-users - Enter the maximum number of sub-users allowed on the account. The default setting is 0. There will always be one admin user on an account.
- Restrict categories? - This relates to account sub-users. When setting up sub-users on the account, if this box is checked you will have the option to restrict which folders the sub-user can access in Collect. If it remains unchecked then no existing folders within Collect will be available for the sub-user.
- Enable Campaign Designer? - Check this box if you wish your client to be able to access our Campaign Designer editor.
Email features
- Email? - This controls access to the email only tools within an account. Unchecking the box will switch off the ability to create and send email campaigns, allowing you to offer an SMS and/or social media account only.
- Custom address type? - This defines the type of 'from' address to be used on campaigns coming from the account. 'Fixed email address' allows your client to add full from addresses to the account (up to a maximum of 10). The client would simply need to choose from a drop-down list of from addresses when creating campaigns if this option is selected.The 'domain' setting allows the domain to be fixed for the from addresses and any pre-fix added to it when creating campaigns. You are able to add more than one from domain to an account.
- Custom address* - if choosing 'fixed email address' you should enter one of their 'from' addresses here (this must be a valid address). If choosing 'domain' you should enter their 'from' domain.
Advanced email options
- Enable split testing? - Tick the box to switch on split testing functionality in the account.
- Enable inbox testing? – Inbox testing allows users to test their emails in a variety of email clients from within the secure application.
Pro options
- Enable analysis tools? - This option switches on advanced analysis reporting tools, such as campaign comparison and performance graphs.
- Enable dynamic content? - If this option is unchecked then campaigns utilising dynamic content will not render correctly.
- Facebook integration - This allows the account to integrate with their Facebook account.
- Twitter integration - This allows the account to integrate with their Twitter account.
- Wordpress integration - Ticking the box enable our Wordpress integration tool.
- RCT editor - This switches on our 'Email Editor' in the account, our newest editing tool.
3. Click proceed at the bottom of the Edit screen to finish the account setup process.
Locking accounts
Accounts can be locked and unlocked by clicking on the appropriate padlock icon in the My companies view. This will prevent a user from being able to log into an account.
Editing an account
The Edit option allows you to amend all options set in the Add company section.
Other tools
Under Tools fall several more options not covered when adding an account but are important to make sure the account is set up correctly for use.
- Manage users - Here you can view and edit the username and details for the admin user on the account, and any sub-users. You can also lock a user to prevent them from logging in or unlock if they have had too many incorrect password attempts. Sub-users can be added by clicking on the green cross and also deleted using the red cross (you cannot remove an admin user). When setting up a new sub-user you will prompted to set their access rights to different areas of the account.
- Manage domains - Use this section to add additional from address details for use in campaigns. Depending on whether you’ve selected ‘domain’ or ‘fixed email address’ under custom address type, you will either be able to add new domains or entire from address respectively here. From addresses can also be edited and disabled using these tools.
Login to an account
The Login option allows you to super-user into an account. If there is more than one user listed on an account then you will need to select who you log in as. You will then experience the secure application exactly as a user would when logging in using the standard login procedure.
Questions?
If you require further assistance with any area of your control panel or client accounts please contact our Support team - support@sign-up.to