Our Email editor has been designed to optimise your fully responsive campaigns, give you more freedom and flexibility with your design and make it easier to keep styling consistent, without a line of code in sight (it's all taken care of behind the scenes). From structure and layout (the "Components" tab), to fonts and colours (check out "Themes"), to uploading and adding images (the imaginatively named "Images" tab) - it's quick and easy to build a beautiful email your subscribers will love.
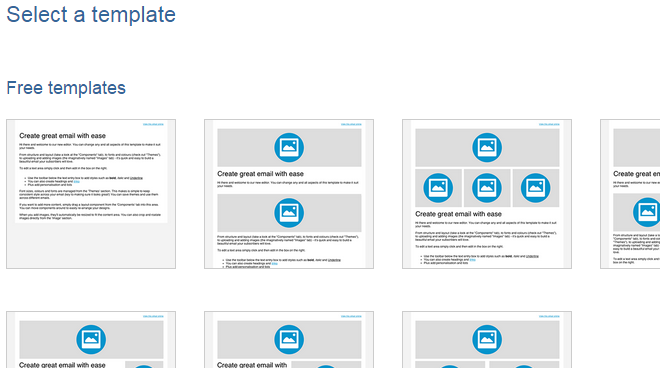
To access the editor, go to the Create tab, select Campaigns and then click on the large 'Email editor' box to take you through to our template browser. These saved templates can be used as a basic layout for your campaign, but the structure can be adapted once you are in the editor if you need.
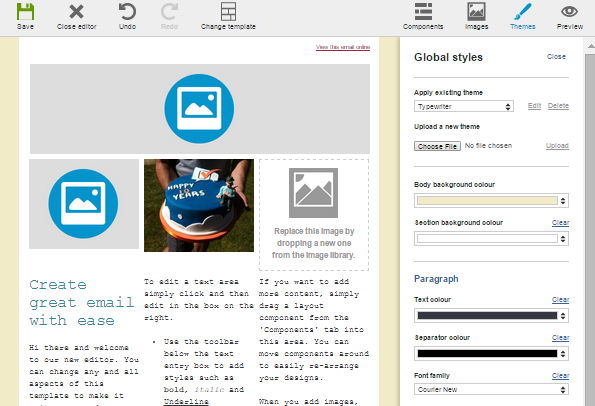
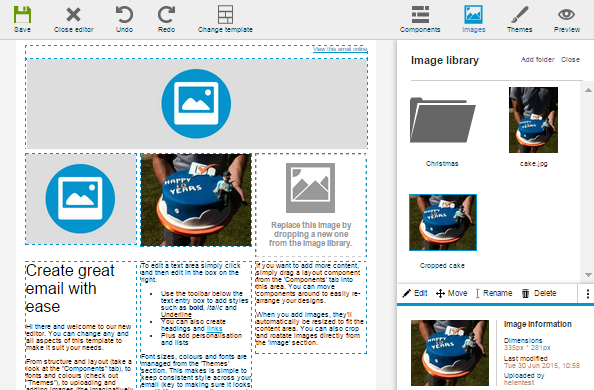
Your campaign is displayed in the centre of your screen, with content management handled in the panel on the right-hand side. This panel opens when you click the Components, Images, Themes or Preview icons, or when you click to edit an image or text already added to the campaign.
![]()
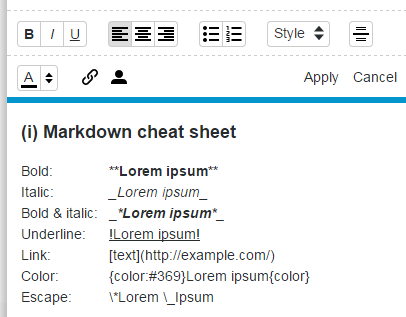
To edit a text area simply click in the area in the campaign and then edit in the panel on the right. You can add basic formatting to your text by highlighting the text in the text box in the panel and using the toolbar below to add styles such as bold, italic and underline. Alternatively you can use the markdown language from the cheat sheet such as **bold**, _italic_ and !Underline! You can also create headings and links with the toolbar, plus add personalisation and bulleted/numbered lists.
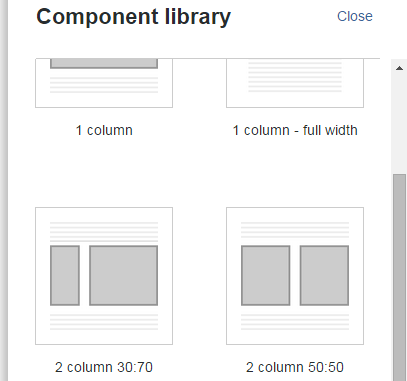
The structure or layout of your campaign is made up of components. If you want to add more content to your campaign, simply click on the "Components" icon and drag a layout component from the panel into your campaign. You can move all components around easily to re-arrange your design.
When you add images, they'll automatically be resized to fit the width of the content area. You can also crop and rotate images directly from the "Images" tab.
Please note: we would always advise resizing your images to the actual components width where possible. A handy guide on image quality and image sizing for the Email Editor can be found here.
Font sizes, colours and font families are managed from the "Themes" tab. This makes it simple to keep styling consistent across your email (key to making sure it looks great!) You can save themes and use them across different email campaigns.