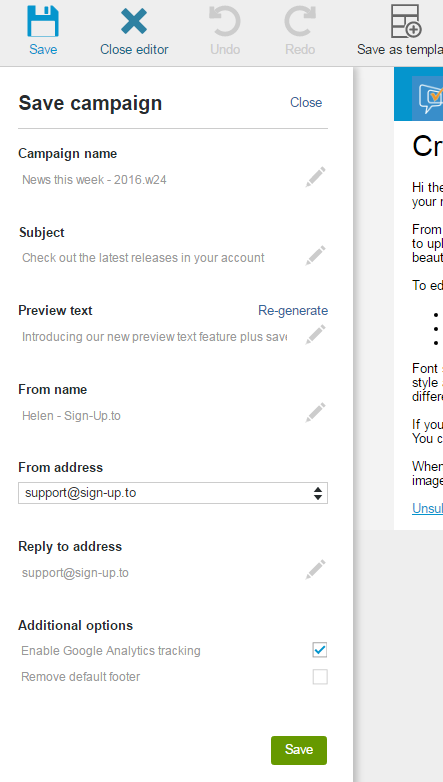
Saving a campaign is pretty straight forward - simply click on the Save icon in the top-left corner, complete the fields and click 'Save' at the bottom of the Save pane - but there are a few additional features that you might not be familiar with. Here is an overview of the Save fields.
Campaign name
The campaign name is for your reference only and will not be visible to your subscribers when you send a campaign. The campaign name will be your way of finding your email campaign in your account, in the Create, Send and Analyse tabs. If you don't specify a campaign name when you save your campaign, the default name will be 'Campaign -' followed by the date the campaign was originally created.
Subject
This is the subject line that your subscribers will see in their inbox before they open the email campaign, and above the campaign once they open it.
You're able to personalise the subject line which can be a great way of addressing the email directly to your subscribers.
Preview text
In addition to the subject line, some inboxes also show the beginning content of your HTML campaign in text format before an email is opened. Depending on your content, this may not always be ideal, so we have an additional preview text field that allows you to set the additional text to display. How much that displays will depend on the inbox.
By default we automatically generate preview text (also known as pre-header text) from the copy in the first text article in the campaign, the first time you open the Save pane. Editing the preview text field will not alter the content of the campaign. If you make any changes to your campaign and you wish for the preview text to match, simply click 'Re-generate' to automatically re-generate the preview text field.
From name
This is the name that you would like the campaign to show as coming from - be that personal name, team, company/brand name or a combination. The from name will display in the subscriber's inbox and above your campaign once opened.
You're able to personalise the from name if you have this data stored as a profile field within your subscribers profiles. This is a great way to personalise the from name if you have different account managers etc. for each subscriber.
From address
Quite simply this is the address that you wish to send from. 'From' addresses must be valid addresses activated via your account Settings before they will display here.
Technically speaking campaigns will be coming from the Sign-Up.to system rather than directly from your 'from' address, so for improved delivery we recommend adding an SPF record to your 'from' domain, to show the receiving mail server that we are permitted to send mail on your behalf.
Reply to address
The 'reply to' address can be any valid address and does not have to be activated in your account. We recommend using a monitored address that subscribers can respond to rather than a no-reply address.
Enable Google Analytics tracking
If you have a Google Analytics account set up for your website, you can enable Google Analytics tracking on your campaign and further track subscriber interaction on your website.
Remove default footer
If you include our unsubscribe campaign link within your campaign, we give you the additional option to remove our default unsubscribe footer when it’s sent.