| This guide references Campaign Designer and Classic Editor, legacy features which might not be available in your account. |
Our Campaign Designer and Classic Editor modes make it easy to create beautiful emails. We've included a range of tools to help you build and edit your campaigns. Here's a quick guide on what each of the icons is for and links to any relevant tutorials.
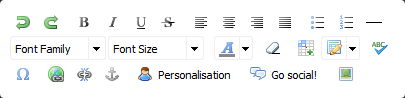
The toolbars are slightly different. The one in Classic Editor always sits across the top of the screen whereas the toolbar in Campaign Designer appears when you click on an editable section.
Campaign Designer
Classic Editor

 |
Undo/Redo These buttons do exactly what they say on the tin. If you've made a mistake, you can undo your last few actions back to your most recent save. Don't worry if you go too far back, you can redo them again too. You can also use the keyboard shortcuts Ctrl+Z and Ctrl+Y to undo and redo actions respectively. |
 |
Bold, italic, underlined and strikethrough text These buttons function similarly to those in word processing programmes like Microsoft Word. The first adds a <strong> tag to highlighted text, making it appear in bold. You can also use the Ctrl+B keyboard shortcut. The second adds an <em> or 'emphasis' tag to highlighted text, making it appear in italics. You can also use the Ctrl+I keyboard shortcut. The third button underlines highlighted text. You can also use the Ctrl+U keyboard shortcut. The fourth button puts a line through highlighted text so it appears crossed out. |
 |
Align Text These buttons allow you to align text to the left or right, centre align text or justify it (this spaces text so that it aligns both the left and the right margin). |
 |
Bullets and numbering When creating a list, you can add bullet points or numbering to make your content clear. |
 |
Horizontal line Use this tool to add horizontal lines to help break up your campaigns and separate sections. |
 |
Font Family This tool can be used to customise the font of text in your email campaign. It's important to specify this so that the font doesn't change when it's delivered to different email and webmail clients. Highlight the required section of copy and then make a selection from the drop down menu. |
 |
Font Size This changes the size of the copy. It's important to specify the font size so that it doesn't change when it's delivered to different email and webmail clients. Highlight the required section of copy and then make a selection from the drop down menu. |
 |
Font Colour This changes the colour of the copy text. You can select a colour from the colour picker or use a hex code if you know it. It's important to specify the colour so that it doesn't change when it's delivered to different email and webmail clients. Highlight the required section of copy and then make a selection. |
 |
Remove Formatting This strips out all of the styling applied to highlighted text. This is really useful if you find that the formatting of the text is changing when your campaign reaches the inbox (something that often happens if you copy and paste text from a word processor). Simply remove all of the formatting and then reapply it with the font family, size and colour tools. |
 |
Add and modify tables Adding a table is the best way to get images in your email campaigns to line up side by side. Once you've added a table, you can then specify the heights and widths, borders and padding, alignment and all of the other options using the modifications drop down menu. Read more about using tables or see our table troubleshooter. |
 |
Toggle spell checker on and off If you want to check your spelling, toggle on the spell checker. It's static, so you'll need to turn it off then on again to refresh it once you've made changes, and it won't check your punctuation or grammar. |
 |
Insert a symbol Add symbols or special characters to your campaign. It's important to use this tool rather than copying and pasting special characters in, because the tool will insert the correct character code into the HTML so that it will render correctly in the inbox. |
 |
Insert, edit or delete a link Use the first button to insert hyperlinks, send an email to a specific address, or add campaign links such as unsubscribe or forward to a friend links. Highlighting copy which has been linked and then clicking on the second button will remove the link. If you are working in a copy of a campaign and are trying to update an older link you should always remove it first and then re-insert it. This will ensure the link is correctly updated. |
 |
Add an anchor tag Using anchor tags allows you to link from one part of your email to other part. For example, you could have a menu at the top with links to various articles in the email below. |
 |
Add personalisation You can use personalisation to add information to your email which is specific to a subscriber. For example, address them by their first name or use unique information you've collected from custom subscriber profile fields. |
 |
Add social sharing buttons This tool allows you to add links to your social media pages, such as Facebook, Twitter and LinkedIn. These links come with ready-made icons which your subscribers will be familiar with. |
 |
Add or edit an image Here you can upload your images to your library, where we'll host them for you. Choose the size of your image and the alt text which should appear if the image isn't downloaded. Then insert it into your campaign. |
Classic Editor has a few additional icons which aren't available in Campaign Designer:
 |
Toggle full screen mode This tool makes the editor take up the full height and width of your display screen. |
 |
Print your campaign This tool sends your campaign to a printer, if you have one set up for your computer or device. |
 |
Clean up messy code This tool will tidy your HTML code so that it's arranged with each tag on a new line. This organises your code so it's easier to manage and work with. |
 |
Cut This tool removes anything you have selected but retains a copy of it which you can then paste back into your campaign. A great shortcut for this is to use Ctrl+X on your keyboard. |
 |
Copy This tool takes a copy of anything you have selected, which you can then paste into your campaign. A handy shortcut for this is to use Ctrl+C on your keyboard. |
|
|
Paste If you cut or copy an item, you can then insert it into your campaign again by pasting it. We have three different paste tools here:
|
 |
Indent The indent tool moves items away from and towards the margin against which they are aligned. |
 |
Text background colour This tool adds a colour in behind copy, making it look as if it's been highlighted. |
 |
Format text This tool allows you to apply previously defined formatting (font family and font size) to highlighted copy. |